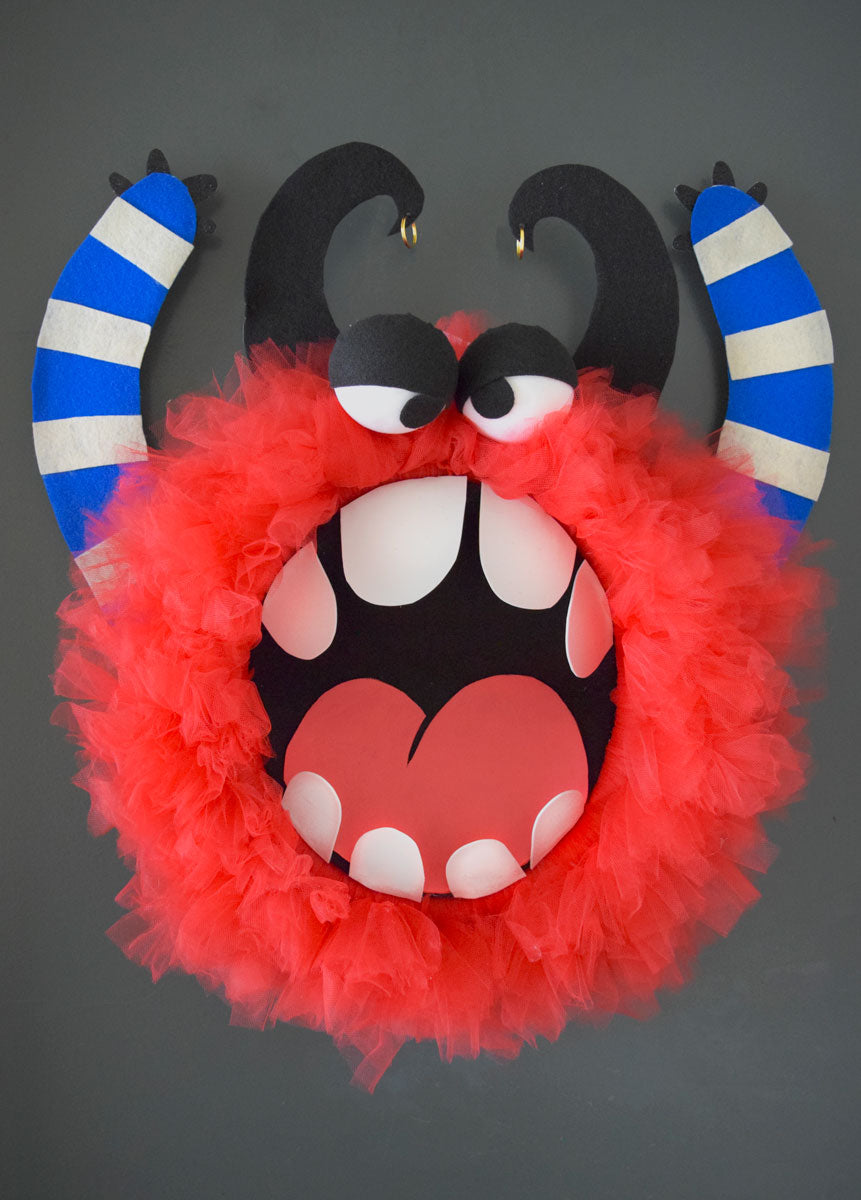
Upcycled DIY Spooky Monster Wreath Tutorial
Share
Halloween is just around the corner, and what better way to get into the spooky spirit than by crafting a delightfully eerie monster wreath for your front door? This fun and creative DIY project will not only add a touch of Halloween charm to your home but also provide a perfect opportunity for some family crafting.
I made most of this with materials you can easily procure at a crafts store, but I have also included sustainable suggestions on how to upcycle AND save money.
So, gather your supplies and let's create a monstrously good decoration!

Materials You'll Need:
- 10” Wreath Base: Instead of a conventional Styrofoam wreath, consider more sustainable options. You can create a wreath base by bundling together fabric scraps or old clean clothes in a ring, secured with twine or raffia.
- 2 Rolls of Precut Tulle Spools: While polyester tulle is commonly used for its fluffy appeal, it's not eco-friendly. You can explore sustainable alternatives like upcycling an old ballet tutu or sourcing tulle from fabric reuse stores, like the ones listed here: https://swoodsonsays.com/a-creative-reuse-center-near-me-map-resource/
- Cardboard: Save clean cardboard boxes or find free cardboard from USPS.
- Eyeballs: Skip the toxic choices like ping-pong balls or styrofoam balls. Instead, repurpose old plastic Easter eggs. For a unique touch, craft one giant eyeball in the center of the wreath using papier-mâché over a rounded form like a bowl.
- Bonus Decorations: Raid your craft stash for spooky decorations like plastic spiders, snakes, and other creepy-crawlies. Consider using small plastic body parts salvaged from old dolls, such as fingers and eyes, to enhance your monster's ghoulish appearance.
- Glue Gun and Glue Sticks: A glue gun is essential for securely attaching decorations to your wreath. Consider using both low and high-temperature settings as needed.
- Felt: Upcycle existing materials or cut up old garments intended for donation. Different colors and textures can enhance your monster's facial features and other embellishments.
- Scissors: You'll need scissors for cutting fabric, plastic, and paper/cardboard.
- X-Acto Knife or Other Blade: If your cardboard is thick, a blade may work better for cutting.
- Twine or Ribbon: Choose a suitable twine or ribbon to hang your wreath.

Step-by-Step Instructions:
I followed both of these tutorials to understand the base foundation of how to do this- and improvised the rest- like the legs, arms, horns and giant mouth palate (inspired by my costume work on Crank Yankers!).
How to attach the tulle:
https://www.babyrabies.com/2009/10/tutu-cute-halloween-wreath/

How to assemble the wreath:
https://www.babyrabies.com/2012/09/boo-its-a-monster-of-a-wreath-tutorial/

Finally, attach a Halloween-themed ribbon to the top of your wreath and hang it proudly on your front door. Stand back and admire your spooky creation!
Tips:
- Don't be afraid to experiment with colors and textures for your monster's features. The more unique, the better!
- If you're doing this craft with kids, let them get creative and come up with their own monster designs.
- Consider using battery-operated LED lights to add an eerie glow to your wreath, especially if you're going for a scarier look.
Crafting a spooky monster wreath is not only a fantastic way to get into the Halloween spirit but also an enjoyable activity for the whole family. Your one-of-a-kind monster wreath will surely be the talk of the neighborhood, and it's a wonderful decoration that can be cherished year after year.
Happy Halloween crafting!

